

A universal and low-cost method of irrigation is increasing the number of its supporters every day. Today we will talk about how to make drip irrigation with your own hands and how to use this irrigation technique correctly.
There is a lot of talk about the benefits of drip moistening the soil. This watering device is effective and convenient in greenhouses and open ground. This type of irrigation increases the useful water consumption to almost one hundred percent. For which crops can spot irrigation be used? Full soil moisture is beneficial for tomatoes and other vegetables, which will delight you with flowering and fresh herbs.

Facts for those who doubt whether a spot watering method is needed for the garden:
- the commercial output of tomatoes, cabbage, bell peppers, carrots and other vegetables increases by almost ninety percent;
- water consumption for irrigation is reduced by half, you can clearly regulate how much to water;
- plantings in the garden are less susceptible to disease;
- fertilizers are delivered directly to the roots of plants, which increases their effectiveness several times.
For your information! Drip irrigation significantly saves water consumption. It will be indispensable in areas with low pressure in the water supply. The system can even operate by gravity; to do this, you will need to install a storage tank (barrel) on the site and throw hoses from it to the beds.
In this material we will try to figure out how to make a drip irrigation system, how to assemble it with your own hands and how to choose components of suitable quality from manufacturers for irrigation. We will find out how much water which plants need, which one is needed, whether a filter is needed and what pressure needs to be maintained in the pipes. In conclusion, we will tell you how to use spot irrigation and how to properly care for the structure.
The photo shows an example of the system:

Effective types of watering in the garden
In the list of the most popular methods of watering plants, sprinkling takes first place. Such systems do not require special investments and are very easy to use. They consist of a hose and a sprayer (sprinkler). In addition to the manual method of watering, there are also devices for automatic sprinkling. There are types of sprinklers that rotate around an axis and thus cover a large irrigation radius. They are also called sprinklers.

For your information! A pump for pumping water into a garden irrigation system is installed at a well or borehole. There are units that connect directly to the water tap and create increased pressure, pumping out its contents.
To moisten the soil at the roots of trees, a subsurface irrigation system is more effective. A targeted drip supply of moisture directly to the root system will have a beneficial effect on the plants in the greenhouse. This type of watering can also be automated.
We have listed the main types of field irrigation, but modern manufacturers are offering new complexes that use the latest automation systems. They use sensors that measure soil moisture and precipitation, and programmable timers.

It is quite possible to make a watering mechanism yourself. There are various types of hoses and all components of automated systems on sale.
Pros and cons of drip irrigation in a greenhouse
Any plant care system has its disadvantages and advantages. Drip irrigation is no exception.
| pros | Minuses |
| Reducing water consumption by half compared to sprinkling. The drip irrigation technique was first invented and tested in Israel, where water is of great value. | The system's droppers are constantly becoming clogged. To resolve this issue, you must use filtering. |
| Another advantage is significant. Spot watering is especially useful for tomatoes and cucumbers. | |
| With the help of such irrigation, it is possible to deliver nutrients and fertilizers directly to the roots of plants. In addition, pest control agents can be added using this method; they will be extremely effective. | Thin drip lines are often damaged by rodents or pets. |
| Drip irrigation prevents the formation of a hard crust on the soil surface. Loose soil allows oxygen to pass through, which is essential for plant roots. | |
| Watering can be carried out even on hot sunny days, without fear that drops of water will lead to burns on the leaves. | The service life of a set for spot irrigation is no more than two years. Afterwards you will have to buy a new one. |
| With spot irrigation, it is possible to regulate the temperature and water the plants with warm water, avoiding shock. | |
| The system can operate even in the absence of pressure in the water supply. | Installing the system requires financial investment, as does its timely updating. |
| Drip irrigation significantly saves time and effort. |
Drip irrigation: what does the system consist of?
All elements of a point irrigation system can be purchased separately and assembled with your own hands:
- Droppers or drip tapes– carry out a gradual supply of moisture to the roots of plants. Droppers can be non-separable or collapsible (the latter are convenient for cleaning). In some versions, they have adjustments that allow you to control the intensity of watering.
- Supply hose– supplies water to the systems.
- Switch taps– connect and disconnect water in different directions of the system.
- Masterblock– a device with a set of filters and a pressure regulator.
Important! Before purchasing materials for drip irrigation, it is necessary to make careful calculations, or even better, draw a diagram of the entire system. This way you can save a lot on materials.

How to choose the right tapes for drip irrigation
There are three main types of drip tapes:
- tape Labyrinth;
- emitter type tape;
- slot tape.
Let's look at each of these types:
| Types of watering tapes | Description |
 Labyrinth | Labyrinthine channels are formed on the tape material. They reduce the speed of water flow. Labyrinthine canals are very fragile and are easily damaged during installation. In addition, it is important to know how to properly lay such watering hoses. |
 | In this option, labyrinth partitions are not located along the entire length of the hose, but in places where there are laser-cut exits. Installation of such a system is much simpler. Please note that a slot system requires good filtration. Such a device can be inexpensively installed with your own hands. |
 Emitter | This tape irrigation uses individual drippers built into the hose. They practically do not become clogged during operation due to the self-cleaning process. This quality directly affects the price of the product. Their production requires significant costs. An example of such material is Tuboflex tapes. |
Answering the question of which drip tape is better is not easy. User opinions in reviews vary. The choice in most cases depends on the financial capabilities of the summer resident. And yet, many consider emitter hoses to be the best, despite their decent cost.
For your information! A little about the characteristics of the water supply channel. The tapes are available in two standard diameters - 16 and 22 millimeters. The most commonly used hose is 16 mm in diameter. Its maximum working length is two hundred and fifty meters. When calculating the length of the drip tape, it should be taken into account that twenty-two-millimeter hoses cannot have a length of more than four hundred and fifty meters.
The strength of the tape depends on the thickness of the material. It ranges from 0.125 mm to 0.4 mm.

Advice! If you plan to use the tape for one season, purchase material with maximum wall thickness.
The distance between the emitters is also an important factor when choosing. For different types of plantings, the correct number of outlet holes should be selected. Carrots, onion sets and other densely planted crops need tapes with closely spaced emitters. Tomatoes, cucumbers and other plants planted at a large distance will benefit from a tape with a distance between holes of 30 centimeters or more. How to lay tapes and what distance between tapes must be maintained in the following video:
For your information! A hole pitch of 10 to 20 centimeters is used for watering sandy soils and, if necessary, wetting plantings in a continuous line. Thirty-centimeter distances are suitable for planting potatoes, cucumbers, and bell peppers. Forty centimeters and more - for melons.
How to select the moisture consumption of the emitter:
How to mount pieces of tape together? How to connect a water control and supply system to it? Fittings will be required for this purpose. They are selected according to the diameter of the tape.
One last thing: how much does the tape cost? Its price starts from three rubles per meter and can reach ten to fifteen rubles. Tapes are sold in coils by the meter.
What are start connectors for drip irrigation and how to use them
The starting connector is also called a fitting. It serves to connect parts of the irrigation system into one whole. You can buy connectors with a tap, rotating, branched. All these parts are necessary for installation.

Advice! Before purchasing fittings, draw up a connection diagram for all parts of the drip irrigation structure. Mark the places where the starting valve, splitter and other elements should be located.
Fitting connection options:
| Fitting connection options | Description |
 Thread Thread | Threaded connectors are designed to connect to standard water pipes with ¾ or ½ threads. |
 Herringbone Herringbone | Designed to connect the system with PVC pipes or soft hose. Especially in demand by summer residents, as they are used as a temporary connection |
 Straight Straight | Connector for connecting PVC pipes of the same diameter |
 With seal With seal | Suitable for connection through a hole drilled in the pipe wall. Equipped with a rubber sealing ring. |
All fittings listed are suitable for the system Tuboflex and other kits for point irrigation.

An important element of the system: drippers for irrigation
The main thing in spot watering is a dropper, which directly supplies moisture to the roots of plants. This element of the system is mounted in a tape or hose.
Important! Installing droppers with your own hands means that each of them will be directed directly to the roots of flowers and vegetable crops.
Over time, any dripper becomes clogged and tiny particles of soil fall into the hole. If the device can be disassembled, do periodic cleaning. If not, you can try to blow out the system with an air pump.
Types of drippers in greenhouses:
| Types of droppers | Description |
| Adjustable | They have a removable lid for cleaning and regulate the flow of liquid from drops to streams. |
| Unregulated | A dripper irrigation system of this type does not provide the ability to increase or decrease the liquid supply at will. The intensity of irrigation depends only on the pressure in the pipes. For uniform watering it is necessary to use compensators. |
| Compensated | The complex design of such drippers with silicone membranes makes it possible to consume a strictly defined amount of moisture, regardless of the pressure in the water supply. |
| Uncompensated | They are based on a regular labyrinth, which reduces the speed of passage of the water flow. |
All these devices can be used for drip irrigation, greenhouse crops and open ground plantings.

Basic principles for selecting droppers:
- they should be easy to clean from clogging. Removable caps are very convenient; they allow you to quickly and easily return the IV to service;
- The device's throughput is important. The bigger it is, the better. In this case, for cleaning it is enough to increase the liquid flow;
- the use of high-quality polymers that do not react with chemical fertilizers.
You can make an external drip for irrigation yourself. Many gardeners use medical devices for these purposes; you can make a simple device from a plastic bottle. The price of a homemade device will be several times less, especially if you use available materials. The following video shows an example of how to make a drip irrigation system for cucumbers:
Automatic types of drip irrigation, where they can be purchased
An automatic self-watering system greatly facilitates the gardener’s work. Modern manufacturers offer the best systems with timers, sensors and programmable controls. The price of the machine starts from two and a half thousand rubles. Where can I buy ready-made kits for greenhouses? They are offered by numerous online providers. There are systems for several greenhouses or irrigation of large areas. In this case, it is better to entrust the installation of the watering complex to professionals.
What is included in the irrigation complex and how the system works:
| Component of the complex | Description |
 Capacity Capacity | You can use water from a barrel or plastic tank. It should be located in such a container. Plants in a greenhouse need warm water. |
 Controller Controller | A device that turns on watering at the right time of day and regulates its intensity. This device effectively controls water consumption. |
 Sensor system Sensor system | The devices control water heating, soil moisture and temperature conditions. |
 Pipe and dripper system Pipe and dripper system | Directly supply water to the plants. |
What is the best automatic watering system? For greenhouses made of polycarbonate or other materials, there are several options for automatic irrigation:
- Drip point– protects plantings from the first frosts, optimally consumes moisture.
- Sprinkling– water is supplied from above using special sprayers. This option is not bad for a greenhouse, but don’t expect any water savings in this case.
- In-ground– requires large expenses for arrangement, since it is necessary to bury perforated pipes in the soil. Used in large greenhouse farms.
Which system to choose? In each case, the approach is purely individual. In-ground irrigation is considered more effective than spot irrigation, but requires greater costs; sprinkling reduces costs to a minimum, but is inferior in efficiency.
You can assemble automatic systems with your own hands; for this, all the elements necessary for installation are on sale. You can choose ready-made options from manufacturers, for example, or.
Advice! To decide on the automatic watering system that is most suitable for you, take the time to study the reviews that buyers post online. As a rule, it is in them that all the advantages and disadvantages of devices are objectively assessed.
Drip irrigation system for the Zhuk greenhouse: features and cost
The kit for the Zhuk automatic irrigation system is connected to a container of water. If necessary, you can take water not from a barrel, but directly from a water pipe. Installation of the device is extremely simple. To automate watering, you can install it with a timer; it is sold separately.

Non-toxic materials were used to manufacture system elements. You can buy such a set at a price of 1600 rubles. The timer will cost two and a half thousand. The device is designed to water six dozen plants on two.

Automatic drip irrigation set "Aquadusya"
The Aquadusya system can be used not only in greenhouses, but also in open ground. It is available in two versions: full automatic and semi-automatic. Currently, semi-automatic kits marked 60 and 50 have been discontinued and what is being sold are remnants of batches. Modern models "Aquadusi", Start And Water Tap, can work both without automation and with it. The difference between the Start and Water Tap models is that the first uses warm water from a barrel, and the second uses cold water from the water supply system. Greenhouse plants need warm water. Cold water can be used to water flowers and vegetables planted in open ground.
An automatic irrigation kit allows you to leave the area unattended for a week. This is very convenient for summer residents visiting country estates on weekends.
For your information! To pump water, Aquadusya uses a battery-powered pump. For this reason, there is no need to lift the container with liquid onto a high stand to ensure pressure.
In the set "Start" there is a float. If you install it on a water pipe going into a barrel, after filling the liquid supply will be stopped. The principle is the same as in the toilet cistern.

But Water Tap will only work if the pressure is at least 0.3 atmospheres, and this does not always work out, especially during the season.
Greenhouse drip irrigation kits: reviews of popular models

Olga, 38 years old, Tver:“I tried the kit last year. We used it in conjunction with a thousand-liter barrel. Mostly satisfied. The only problem is that it often gets clogged, but my husband read that you need to use filters. This is correct, we draw water into the tank from a well. This year we are purchasing filters and a timer.”
Sergey, 64 years old, Novgorod: We had to replace all the taps; they leaked on the first day. After changing the fittings everything worked just fine. Installing the Beetle is as easy as shelling pears, it’s worth cleaning it up for the winter, that’s not difficult either. Overall satisfied."

Evgeniy, 47 years old, Bryansk: We installed the system for a grandmother in the village; she is no longer old enough to stand with a watering can every morning. There is no end to the delights. And the yield has increased, and there is no need to constantly draw from the barrel and fill it again. Everything works automatically."
Ekaterina, 39 years old, Rostov:“We went broke on this device, one might say, forcedly. We planted a vegetable garden, and then had to leave for ten days on family matters. The summer was very hot. My husband installed the system and turned it on, but there wasn’t much hope. Upon returning home, a real surprise awaited us. Not a single plant died, despite the heat! Very happy with the purchase!”

Egor, 52 years old, Smolensk:“I noticed that after installing the system, the tomatoes began to hurt less. If you haven’t decided which set is best for a greenhouse, take this one. I installed it in literally an hour, no difficulties arose.”
Ksenia, 33 years old, Tver:“Immediately after installing the Water meter, I was worried that very little water was coming out. Usually you stand with a hose all morning, and there is little use, but then there are some drops. Out of curiosity, I picked up the soil at the roots of the peppers. Surprisingly, the ground is moist, and it does not dry out, as usually happens under the sun during the day. The results were calculated at the end of the season. In all crops, the yield increased by 30-40 percent.”
Gardena

Stanislav, 61 years old, Ulyanovsk:“Age doesn’t allow me to care for my garden the way I used to. My son bought the irrigation system. They set it up in the beds in two hours. It’s good that the hoses are flexible and can be laid out as needed. Now there are no problems with the spill. We’re just harvesting.”
Kristina, 28 years old, Maykop:“I have two greenhouses for early cucumbers and greens. We installed Gardena complete with a still barrel. The water is heated by a heating element, watering goes directly to the roots. The vegetables are developing very well and I am now planting a second batch in late summer. I get another harvest, everything is green, even when the temperature outside is approaching zero.”
How to make your own drip irrigation system for a greenhouse
You can make a device for spot irrigation yourself. It's not as difficult as it seems. A homemade kit will cost much less than the factory version.

Some important tips for configuring and using equipment:
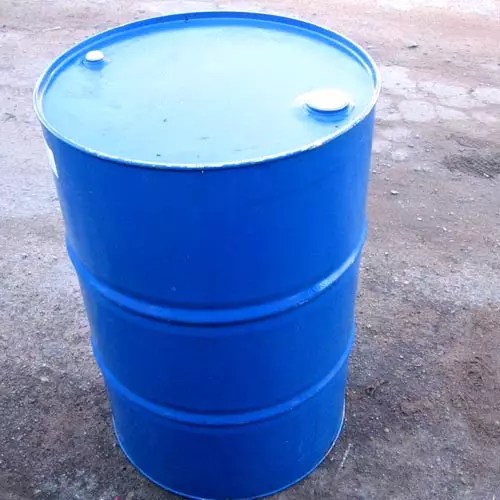
- The reservoir for the watering system must be made of plastic. Metal barrels quickly rust, and the smallest particles of rust instantly clog the droppers.
- The barrel should be filled with cleaned and. This way you will save yourself from the need to frequently clean the micro-irrigation system.
- At least once every ten days it is necessary to check the functioning of the system and the cleanliness of the filters.
- Dissolve fertilizers thoroughly before adding them to a container of water. After adding chemicals, the barrel and belts must be washed.
- Disassemble the capillary irrigation kit for the winter.
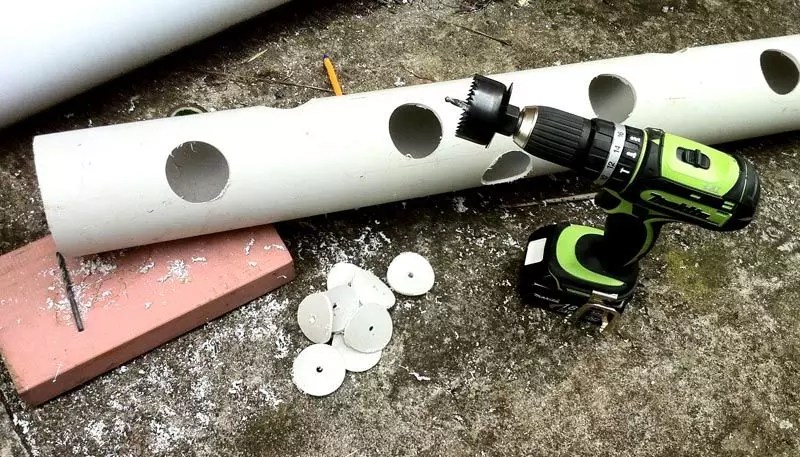
How to make a device yourself? To work, you will need a drip tape, a tank, a water pipe, fittings for connecting parts, a mortise tap,.
The photo shows a diagram of the organization of self-watering:

Before installation, you need to decide where the water tank will be located. This is an important issue because the location of the tank affects the pressure in the belts. The higher the barrel stands, the faster its contents are consumed. Do not get carried away with high stands: on hot days the water will drain too quickly, and besides, a high stand will require additional installation efforts.
The tap for connection must be embedded not into the bottom of the barrel, but at a height of five to ten centimeters from the bottom. All sediment will accumulate there and will not fall into the drip irrigation.

Advice! Medical droppers can be used as nozzles for subsoil watering of tomatoes and other garden crops. The diameter of their tubes is only one and a half to two millimeters.
All that remains is to install the pipe for the main liquid supply and plug it at the ends.
Idea! If you still have questions about how to make the device yourself, try a mini-model that can be used in a greenhouse for seedlings.
If you do everything correctly, watering will work without your participation.
Installation diagram for drip irrigation in a greenhouse: what is important to remember
To irrigate plants in a greenhouse, the simplest system with one main channel and drippers connected to it is sufficient. The irrigation barrel can be located in the greenhouse itself or outside. The first option is convenient because on cool days the barrel cools down less. In the second, free access will be provided to the container, which will facilitate its timely cleaning and filling. So think carefully about how to install the tank. To estimate the minimum tank volume, multiply the area of the greenhouse by 20 (the required amount of water per square meter). For example, for a greenhouse with an area of 30 square meters, you will need to install a container with a volume of at least 600 liters.

Advice! Use plastic pipes to organize the main channel.
The distance between the droppers in the diagram should be at least thirty centimeters. Drip irrigation lasts 2-3 hours a day. This is the time required to fully supply plant roots with moisture. If you leave watering for a longer period of time, the roots may rot.
Advice! The length of the drip lines should not be more than one meter.
To understand how to organize drip irrigation, develop a detailed drawing. Indicate on it all the joints, points and fastenings.
Video example of how to properly do drip irrigation in a greenhouse:
Requirements for the main pipe for drip irrigation
HDPE pipes with a diameter of 32 or 16 mm are used as the main line. You can also make a line from PVC pipes or metal-plastic pipes. How to choose something most suitable? It is difficult to say which pipe is better, they are all quite strong, durable and excellent for irrigation. And their price is almost the same.
When deciding which diameter to choose, consider the size of the area being irrigated. In a greenhouse, it makes sense to make the main supply from polypropylene pipes of smaller diameter.

Practice advice! To easily insert pipe fittings, use a screwdriver and a wood drill for drilling. They do an excellent job with polyethylene pipes.
Before inserting the drip hose, rubber seals must be inserted into the drilled holes. Without them, the oozing hose will lose a lot of precious moisture.
How to make a main pipeline with your own hands in this video:
Venturi injector or plant feeding unit
Timely application of fertilizers is a condition for good yield. Scientifically, the process of applying fertilizers during irrigation is called fertigation, and the source from which dissolved chemicals are delivered to the roots of plants is called a fertigation unit or a feeding unit.
To apply fertilizers, you can choose periodic or continuous mode. The simplest calculation is a concentration of three to ten kilograms per hectare.
How to dose chemicals for drip irrigation? For this purpose you will need a fertilizer tank and a Venturi dispenser.
The dissolved chemicals are placed in a separate container. They enter the drip irrigation system in parallel with the main moisture, mixing with it. At first glance, the installation is very primitive. But how to choose the right proportion for mixing and maintain the required concentration?
The principle of operation of the Venturi injector lies in the specificity of the movement of liquid under a pressure difference. Water passing through the dispenser forms a vacuum, which carries the chemical solution with it. Thus, the two liquids are mixed in the main main channel and evenly flow to the roots of the plants. The injector can be connected to a 1" or 2" pipe. You can buy Venturi at any gardening store.
Dispenser device in the diagram:

For your information! The dispenser is made of chemical-resistant materials.
Another option for maintaining the necessary concentration of chemicals is the use of dosatron. This is a more advanced and accurate control system. It is not difficult to install it directly into a drip irrigation system with your own hands. There is a turbine inside the device, which is driven by liquid pressure in the pipeline. The dosatron adjustment is carried out only when it is installed. Further, the device does not need your attention. There are many videos on the Internet on how to properly use and install the dispenser.
Main characteristics of the fertigation process:
- fertilizing should begin no earlier than half an hour after the start of irrigation;
- feeding duration is 30 minutes plus another half hour for rinsing with clean water;
- the amount of chemicals to be added is one kilogram per thousand liters of liquid, no more;
- When applying chemicals, care must be taken and personal protective equipment is required.
Using filters for drip irrigation
Without a filter, a homemade or factory-made drip installation will clog literally in a matter of days, and if the quality of water for irrigation leaves much to be desired, then in a matter of hours.
Things to consider when choosing a filter:
- what degree of water purification is required;
- device throughput level;
- possible pressure losses in the system due to the use of a filter;
- Dimensions of connections for connecting the filter device.
Which filter to choose for a drip irrigation system:
| Filter types | Peculiarities |
 Reticulate Reticulate | A simple device that can be used if the site receives water from a central water supply. This device has a minimal price and small size. |
 Disk Disk | Fits . Plastic disc cartridges are used for filtering. A fairly large device, it costs more than a mesh device, but has numerous positive reviews from users. |
 Auto Auto | An expensive device with a cyclonic self-cleaning system. Suitable for large greenhouse farms. |
In principle, you can make a filtration system yourself. A simple garden filter for water from a well is made with gravel and sand filler. Such a system is usually placed at the outlet of water from a well, and a second fine filter is installed in the barrel.
It is installed indoors, therefore, you will need to install a drip irrigation installation line from the tank to the irrigation system through the house or.
Not everyone is ready for such expenses. You can make an automatic watering system with your own hands. To do this, a water tank is placed at an elevation sufficient to create the necessary pressure in the line.

All the most important things about drip irrigation materials
We have already talked about how to plan an irrigation system in a greenhouse. The water tank should be made of plastic and located on a high stand. In this case, the water will flow by gravity and you can do without a pump.
Advice! How to make a reliable stand for a tank with your own hands? For this purpose, it is better to use a columnar base or screw piles. Such a strong foundation will not allow a heavy barrel to tip over. Four screw piles are screwed to the required depth, connected with a grillage, on which, in turn, a platform for the container is mounted. In this option, even if you use a two thousand liter tank for water, you can be sure of its stable position.
A main pipe comes from the barrel, supplying liquid to the droppers. For this element of the system you need to buy plastic pipes. If the system provides for pumping water with a pump, it is installed at the very beginning of the main line. The feeding unit with an injector is also connected to the same line. For chemicals, a second container is installed next to the main tank. All this equipment is located on a common platform. You can assemble the components separately, but it’s easier to buy ready-made kits, which include injectors, nozzles, drippers and valves for the greenhouse.
If drip tapes are used for irrigation, they are connected to the main line using tees. You don't need any special tools for this job. Plastic fittings are easy to insert by hand.
Advice! To irrigate plants under covering material, it is better to use drip tape.
A drip irrigation system can also be made from scrap materials. What you need for this: plastic bottles. One container is used for one or two plants. Holes are made in the plastic using a thin awl. The bottle is buried next to the plant. Moisture gradually flows from plastic bottles to the roots. The photo shows a diagram of how to equip watering via bottles:

The disadvantage of such a device is that you will have to constantly fill the containers, and this is a rather labor-intensive task. With a barrel and drippers, you need to spend more time on installation, but the labor costs will quickly pay off in the complete absence of hassle with watering.
The nuances of drip irrigation
In order for the irrigation system to function properly, you must follow simple rules:
- Water for irrigation should be as free of impurities as possible. You can use water from a well, natural reservoir or tap. If the intake comes from a lake or well, install the pump at an average depth, do not raise turbidity and silt from the bottom. Please note that natural reservoirs are inhabited by fry, eggs, larvae and algae, so no matter how clean the moisture may seem, it must be carefully filtered. It is justified to install several filters - at the inlet and outlet of water into the storage tank.
- After assembling the irrigation device in the greenhouse, it is necessary to conduct a trial run and check the operation of the automation. Before starting, check the tightness of all connections; to do this, blow out the hoses and injectors with a pump.
- After startup, determine the optimal operating time for the system. The most optimal operating mode is evening. During a sunny day, the water in the storage tank will warm up, watering will be carried out with warm moisture, the plants will appreciate it.
- Once every seven to ten days, carry out preventative cleaning of the system using pressurized air pump.
That's all the operating principles of the drip irrigation complex.
Article
Preface
Drip irrigation is the best option for arid regions, because you can save money by supplying moisture to the roots of plants at certain hours and regulate the frequency of drops.
What is microdrip irrigation and why is it needed?
No matter how moisture-loving garden crops are, when watering it is very difficult to calculate the amount of water poured onto the beds so that it is no more and no less than necessary, but just right. If there is an excess, a lot of moisture evaporates from the surface, which means it is wasted. It is much more efficient to supply water directly to the roots, without watering the rows and spaces between plantings, which is why the micro-drip method was developed. In small but continuous doses, moisture is supplied to a certain area at the roots, immediately absorbed by the soil and irrigating only the roots.
This method has several advantages over conventional watering. Firstly, by simply spraying water over the plants with your own hands, you flood everything around, and a large volume of liquid is absorbed by a relatively thin layer of soil, without getting deeper into the roots. Accordingly, more and more water is needed, which causes puddles to form on the surface, and the soil becomes oversaturated with moisture, which displaces air, which is also necessary for the roots. In addition, when falling on the leaves and stems, individual drops become natural lenses, collecting the sun's rays into bundles, causing the plants to get burned.
A dosing device can be as simple as a do-it-yourself one made from a hose, or it can include various technical elements. For example, in most cases, a high-quality filter is needed so that the dropper nozzles connected to the main pipes do not become clogged. Also, for automatic water supply, you need a special dispenser controller, in which a valve is installed that opens at certain intervals. Where it is impossible to let water flow by gravity, you will definitely need a pump.

In your greenhouse, micro-drip irrigation will have an even more beneficial effect on the development of plants, since the moisture does not spread over the leaves away from the roots. Complex systems with controlled water supply to each dropper are especially effective. After all, different varieties of the same crop can grow in one greenhouse, requiring different amounts of moisture in the soil. By adjusting each drip tip, you can set a specific water output, from 1 liter per hour to 15 (if necessary). Or you can leave the injectors operating as normal.
The root system of a plant always reaches out to water, and thanks to micro-drip irrigation, the roots do not grow, intertwining into a compact lump in the moisture supply zone.
What types of automatic drip irrigation systems are there?
If you want to purchase a ready-made kit for drip irrigation, you should familiarize yourself with the existing models. The sets come in tubular and tape types. Both are based on hoses, but in the first case they are rigid, and in the second they are elastic, which, when rolled into coils, look like tapes. Tubular ones can be either with built-in output channels-capillaries, or with external ones. Nozzles on rigid tubes are mounted in special sockets or connected with your own hands by connecting to sections of hose. In the tape version, only capillary holes are used.

Now let's turn directly to the configuration of the systems. There are options here, each of which is selected individually based on performance requirements. Some models are suitable only for small flower beds and small greenhouses, others are capable of providing an area of up to tens of square meters. It all depends on the volume of the distribution tank, the diameter of the pipes and the total output of the drippers on each supply line. In other words, if you use long, large diameter hoses with a large number of outlets, the water pressure will drop at a certain distance from the tank.
The simplest kit that you can assemble with your own hands consists of a tank, fittings for connecting a hose and a filter. In this case, the container is placed on a specially prepared elevation, not lower than 1.5 liters from the ground, which ensures sufficient pressure in the system. Next, through a short hose connected to the bottom of the tank with a fitting, a filter and supply pipe sections connected by tees to distribution pipes are connected. The central row is connected to the hose from the tank by means of a cross, to which are connected transverse sections connecting the supply tubes. Along each “sleeve” holes are pierced at certain intervals, through which water flows. All distribution hoses are plugged at the ends.

A more complex system, in addition to a tank, filter and hoses, is equipped with a controller with 2 timers, where the start and end time of watering is set, as well as external drippers stuck into the ground. The device itself starts by pressing a button and works until it turns off or until the capacity of the AA batteries is exhausted. Expensive systems are equipped with full-fledged computers that require connection to an electrical outlet. Otherwise, the principle of operation is the same - water flows into the hoses by gravity from a container placed on an elevated surface. From the hoses, through elastic tubes, moisture flows into droppers, through which it is dosed into the soil. If the irrigation area is large, natural pressure will not be enough and a pump will be required.
Types of nozzles and other devices for drip irrigation
When it comes to dosed irrigation using the microdrop method, many people imagine rare or frequent drops of moisture falling on the ground. However, there may be much more options than how often small portions of water will be measured through the capillaries. The easiest way to get the desired result is to pierce holes in the hose. But for convenience, external dropper nozzles are used, which can be either feed-through (stick into holes along the length of the hose) or end-droppers - instead of plugs.

Among other things, the nozzles are collapsible and monoblock, that is, the former, if broken, can be repaired with your own hands by changing individual parts, and the latter must be replaced completely. According to the principle of operation, droppers are divided into adjustable and unregulated. The former are equipped with a small valve that can be opened completely or to a certain extent by selecting the intensity of watering, while the latter provide a constant dosage of water. Thanks to compensating nozzles, drops fall at a specified frequency, regardless of the pressure in the hose or pipe.
If you want to do micro-drip watering of plants with your own hands, in addition to the nozzles listed, you will probably need other devices for dispensing water. In particular, drip irrigation includes nozzles for six-jet sectoral spraying, the diameter of the moistening zone of which reaches 40 centimeters. Very interesting are linear horizontal sprinklers, intermittent streams of which shoot in 2 opposite directions or in one, narrowly directed at 1-5 meters. For wide beds, a good solution would be a sprinkler that sprays water in intermittent drip streams upward so that they fall on the plants in a canopy, simulating rain over an area of up to 50 meters.

Devices will also be useful, without which automation in the supply and distribution of water on the site is impossible. First of all, this is a soil moisture sensor that will monitor that the soil is not oversaturated with water or has not dried out too much. Among the latest technical innovations, rain sensors should also be noted, which turn off the system as soon as precipitation falls on the ground. However, both controllers can only be connected to a special computer, which is responsible for turning it on and off at a given time or, as already mentioned, according to sensor signals.
How to install a semi-automatic drip irrigation system
Semi-automatic means a constant supply of water to the distribution hoses, without the need to fill the container yourself. Here you can go two ways: connect a hose with a filter and controller embedded in it directly to the water supply through a special valve that significantly reduces the pressure, or connect the pipe to the tank with your own hands. In both cases, there is no need to buy a pump, since water will be constantly supplied to the system due to its own pressure in the water supply. Moreover, the first system can be purchased ready-made, in any configuration.

When connecting to a water supply, the faucet must be connected with a short piece of hose to a special pressure reduction unit, since excessive water pressure can knock nozzles and plugs out of the system. Such a unit may have a filter inside, which allows you to obtain highly purified water. Next, a controller or computer with a built-in valve for closing the water flow is connected, and only then the entire system is connected. To save money on your computer, you can connect a water pipe to the top of the tank and provide a valve with a float to shut off the water supply as it fills. A hose with an embedded filter and, if necessary, a controller is connected to the bottom.
The simplest method of drip irrigation for a greenhouse
All of the above options have a certain price, and often a considerable one. For those who want relatively cheap micro-drip irrigation, it will be easy to make it yourself using ordinary plastic bottles. Their number should correspond to the number of plantings that you are going to water, or, in extreme cases, one for every two plants. Next you have two options. The first one is the simplest. Cut a large hole in the bottom of each bottle (it’s better to take 1.5-2 liters), and pierce several small ones closer to the neck; on one side, if you plan to water 1 plant, or on both sides. Then you simply bury the bottles near each plant or between neighboring ones when planting close together and fill them with water.

The second method is more difficult. In addition to bottles, you will need a hose that is divided into sections along the length of the beds with a small margin and a capacity of 20 liters (more is possible). If water is supplied directly to the greenhouse, we place a container near the tap at the beginning of the beds, and to fill it we use a separate hose, and we attach sections of the second to the bottom and stretch along the beds. Next, in the walls of each eggplant near the bottom, carefully cut out 2 opposite round holes slightly smaller than the diameter of the hose, using scissors or a special drill attachment. We pierce holes in the hose at intervals equal to the step between the plants, and also pierce the bottle caps.

All that remains is to squeeze the elastic tubes into plastic containers, positioning them so that the holes are inside the eggplants. Along the plantings, we stick metal rods or long pieces of cable with an aluminum core with a thickness of at least 8 millimeters into the beds, bend their tops with a hook, and then smoothly bend the ends upward again. We get convenient supports for laying the hose through the air; their height should be sufficient so that the caps of plastic bottles do not reach the ground by about 5 centimeters. Next, we adjust the size of the inlet and outlet holes in each node so that the eggplants do not have time to fill with water and hang the system on supports so that the drops fall near the plants. We plug the ends of the hoses with plugs.
Ecology of consumption. Estate: A healthy root system of plants produces vigorous growth, and drip irrigation can greatly contribute to this. In a greenhouse, a drip irrigation system will allow you to grow strong and healthy seedlings. Let's talk about the features of using drip irrigation systems and about creating it yourself.
Water temperature
Most garden crops experience stress and slow growth due to the low temperature of irrigation water. Cold water has a particularly negative effect in hot weather; plant death is possible.
Since water flows slowly during drip irrigation and has time to pass through a fairly long labyrinth of thin tubes, it warms up well before entering the soil. This makes it possible not only to connect the drip irrigation system directly to the water supply, but even to use water from a well or borehole.

Of course, in the latter case, the main role is played by the length of the line and the operating pressure in the system. Therefore, the system should first be tested; the outlet temperature should not be lower than 18 °C. If the water is not warm enough, a buffer tank of 100–150 liters can save you from installing a full-size tank. Raising the container 2-2.4 meters above the ground is the main problem in greenhouses, most of which are quite squat.

The problem is also solved by installing the cheapest and lowest-power instantaneous water heater. Otherwise, it is necessary to take care of the external installation of the tank and increasing its energy efficiency: lining it with a heat insulator, painting it black and, possibly, installing a heating element.
Soil aeration
Another important advantage of drip irrigation is that it does not soak the soil into liquid mud, so the roots have the opportunity to breathe, and they need this no less than the above-ground parts of the plant.
To make the effect more pronounced, the soil should be prepared in a special way. The top layer in which the seeds are planted is mixed with hygroscopic vermiculite or cereal husk. Loosening and stirring should be done after the soil has thoroughly dried.

However, even with such soil preparation, a continuous supply of “drops” should not be organized. The soil must dry out from time to time, so it is optimal to turn on the system 2-3 times a day at a strictly defined time, for which the system can be equipped with automatic control and shut-off valves.
If watering is carried out only once a day or less often, mulching will help maintain optimal soil moisture. More precisely, laying a layer of limp grass, hay or straw 7–10 cm thick on top of droppers or tapes.
Convenient laying of highways
There is one condition in the greenhouse that promotes faster and more technologically advanced installation of main pipes. We are talking about the roof: a frame is mounted a couple of meters above the ground, so why not use it to secure the pipes? In this case, the system would not have to be completely disassembled every year to dig up the soil, and the wiring along the frame allows the pipes to be fairly accurately aligned. Laying under the roof also contributes to more intense heating of the water.

At the exit from the tank, the pipe drops 40–60 cm for more convenient installation of the piping and collector, then rises again to the horizon, which is 10–15 cm below the bottom of the tank. HDPE pipe is well suited for laying the main distribution; it tolerates interseasonal temperature fluctuations well and ultraviolet.
When laying, it is recommended to focus on the passage paths and place the pipes strictly above them. Under the roof, the pipes are connected using standard press fittings; installation is possible even alone and from a stepladder.
Branches from the main are lowered by tubes of a smaller cross-section at the beginning of each bed, shut-off valves are mounted at the height of an outstretched hand. At ground level, the pipe passes into a horizontal collector through a tee or elbow. The edges of the pipes can be sealed with wooden plugs, holes are drilled in the walls and mortise taps for the tapes are installed.

If drippers are used for irrigation, a large-section main pipe stretches across the beds, branches from it go down to the soil and through an elbow pass into the lower main - a thin tube along the entire bed or each row of planting. Droppers are connected to this channel using crosses and tees.
Tapes or droppers
If you are familiar with the variety of drip irrigation systems, the question of choosing a type does not arise as such - it all depends on the crops being grown, the size of the greenhouse and the features of the system's layout.
If a greenhouse farm is focused on year-round cultivation of vegetable crops, preference is often given to larger and taller varieties with a planting distance of more than 1 meter. Droppers are ideal in this case, because it is quite difficult to find a tape of such a large pitch.

The benefits of drippers are especially pronounced when watering tree-like tomatoes and densely growing cucumbers. During the period of fruit ripening, these plants consume several times more water than at the planting stage. Tapes do not have such a throughput capacity; in addition, adjustable droppers can be installed, or they can be changed as the plants grow older.
Tapes are best suited for nursery greenhouses and growing bush plants. They have an optimal dropper pitch and are able to evenly moisten a large area. A well-known disadvantage of tapes is that their throughput must be adjusted manually, whereas with droppers it is strictly calibrated. Therefore, when using drip tapes, it is recommended to install valve valves instead of ball valves.

Hydraulic piping
A ball valve and a strainer are installed at the outlet of the tank. If fertilizing through irrigation water is planned, an automatic fertigation unit is installed immediately behind the tap. The same possibility is achieved by mixing the concentrate directly into the tank, but not all chemicals are harmless to its walls.

A cartridge filter of up to 50 microns is installed behind the fertilizer dispenser, which should trap undissolved fertilizers and small debris that can settle in the droppers. Afterwards, a distribution manifold is installed with ball valves and detachable threaded connections on the bends, from which the pipes are routed further throughout the greenhouse. Protection against air leaks and a check valve at the top are not required; the piping acts as a water seal. However, it is still necessary to equip the outlets from the main with check valves.
Operating modes and maintenance
Before planting, the system is tested on leveled ground. The intensity of watering is regulated by valves visually according to the size of the moistened areas, so that when the system is turned on, each bed receives the required amount of water.
The buffer tank is very convenient to work with. Its volume is reliably known, which means you can clearly control the amount of water, adjusted for the throughput of each line. A volume of 150–200 liters will be enough for daily watering of an average greenhouse.

In greenhouses with an area of more than 1 arena, the same tank can provide all plants with watering, but with automatic control. In such cases, the volume of the tank is spent on watering individual sections; switching is performed by controlled shut-off valves on the collector. published
The first drip irrigation systems appeared at the time of the general craze for orchids at the end of the 18th – beginning of the 19th centuries, for potted indoor plants. In the middle of the last century, drip irrigation along with revolutionized agriculture. Until then, the immediate future in a world where there was less than half a hectare of arable land left per person looked very bleak. By now, the technology of drip irrigation in open ground has developed to the point of being widely used in private farms, and there are more and more people who want to arrange drip irrigation with their own hands. The main reasons are the fairly high cost of installation of turnkey drip irrigation and the ever-increasing shortage of water suitable for agricultural needs.
The main advantages of drip irrigation, as is known, come down to the following:

We emphasize that these are only the main advantages. Drip irrigation at the dacha can also be beneficial for your own consumption by reducing the need for winter purchases of plant products. However, firstly, the cost of a drip irrigation system is still quite high. Only the cheapest drip tape for open ground (see below) will need the amount approx. from 600 rub. per hundred. For a plot of 20 acres, equipment for water treatment and water supply to belts will cost at least another 5,000 rubles. Total - under 20,000 rubles. for a medium-sized “for yourself” farm.
Secondly, do not believe claims that drip irrigation reduces the labor intensity of private crop production. Caring for a drip irrigation system in small areas will take only a little less time and effort than walking around with a hose. Thirdly, caring for plants using drip irrigation differs significantly from that in traditional agriculture. Therefore, further material is built as follows. way: first we will look at how to make drip irrigation in a small area from scrap materials with minimal or no cost. And having mastered all the intricacies of maintaining garden crops “on drips” and having already accurately assessed, in money terms, its benefits in these specific conditions, it will be possible to think about “real” drip irrigation; we will also talk about it.
Cucumbers – a drop at a time

The best way to learn how to maintain open ground plants under drip irrigation is with cucumbers. Their greenhouse and greenhouse varieties are still inferior in taste and other consumer qualities to garden cucumbers; especially gherkins. But, as you know, ground cucumbers can turn brown due to a sharp change in external conditions. Drip irrigation not only gives the plants optimum moisture, but also creates a more or less stable microclimate around the bushes, so it is best to do your first drip irrigation for cucumbers. Having learned how to get delicious, aromatic, crispy cucumbers “on the drop”, no matter what kind of summer it is, you can “plant on the drop” any other well-known crops.
The most important
Drip irrigation systems come in different types, see below. But even the simplest homemade drip irrigation must satisfy the main condition for all of them: supply water to the plants, and not between the rows, see fig. Otherwise, the plants will get worse, not better; to weeds and pests – on the contrary. In addition, the need for loosening, which injures surface roots, will not decrease, but, on the contrary, will increase. In addition, the wetted soil gets very hot in direct sunlight, so the rows will have to be covered with mulch, and underneath it the unwanted “cultivars” will be a real paradise. In general, one must not hope that the water in the soil will disperse. It needs to go where it needs to go right away; this is the essence of drip irrigation.
About holes
In the first experiments with homemade drip irrigation and then you will need to learn how to make dies in plastic - calibrated and profiled narrow holes for the flow of water. Due to viscous friction in the liquid, they will ensure a fairly stable flow of moisture from one dropper when the pressure fluctuates over a fairly wide range and good resistance of the system to clogging with soil particles.
To form the dies, you will need an electric soldering iron (preferably a soldering pencil with a bronze nickel-plated tip) and a piece of stainless steel bicycle spoke. It is sharpened like an awl and polished (required). The “piercing” tip is attracted to the soldering iron tip with a steel clamp with a screw clamp. Turn on the soldering iron and, when it heats up, tighten the screw tightly, because otherwise, due to thermal expansion, the tip will wobble.
Next you need a piece of transparent garden hose and a plastic bottle. The hose is attached to a hole in its bottom, its free end is bent and pulled together or plugged. The bottle is placed at a height of approx. 1-1.5 m. Then a series of holes are made in the hose with the tip, each time deeper and deeper into the plastic. You need to control how much the tip comes out into the lumen of the hose! How much he got inside each time, we write it down, remember it, and record it in some other way. If, when pulled out, it immediately gets stuck and pulls the plastic, it is poorly polished.
Note: For greater stability of the resulting diameter and profile of the dies, it is advisable to select the temperature of the soldering iron tip using a household thyristor electric power regulator.
To complete the home OCD, we strengthen the perforated section of the hose horizontally with the dies down, and place a beaker under each die; an alternative is an indispensable Russian vessel, a cut glass. We fill the bottle with water and note the time during which 100-200 ml drips from the spinnerets into each measuring container. That's it, now you can make dies for a given hourly water flow, you only need to take into account the wall thickness of the working hose.
We start to drip
Let's start with point drip irrigation systems from dosing containers without water supply networks, as the simplest and cheapest. On large areas they are unacceptably labor-intensive, but on a plot of up to 2-4 acres this has little effect. And don’t think that you’ll have to resort to something high-tech: spot irrigation of small areas of open ground at home is nothing more than drip irrigation from plastic bottles. It can be produced in 3 ways: micro-sprinkling, surface and deep, see fig. Dispensers can also be canisters and pipes. But the former are not wasteful and expensive material, and the capacity of the latter, at optimal depth, is insufficient for the watering rate of most plants.

Micro-sprinkling prevents clogging of the dispenser nozzles with soil, but requires stands for suspension, makes it difficult to fill dangling dispensers and does not allow water to be supplied exactly to the roots. Surface watering requires refining the bottles, which, given the required quantity of tens and possibly hundreds, is very labor-intensive. In deep spot watering from bottles, radical changes have recently occurred that have made it highly effective, see below.

The simplest surface drip irrigation can be organized using plastic containers or 1.5 liter bottles installed in rows between bushes, see fig. The dies in them are made at a height of 3-5 cm from the bottom so that sediment in the water does not clog them. Such irrigation is suitable for moisture- and light-loving crops with fruits located quite high above the ground, for example. tomatoes, eggplants. A serious drawback of this “system” is that mulching of the rows is required; why - see above.
Much better results are obtained by deep watering from inverted and cut bottles, left and center on the trail. rice. Mulch is no longer needed, filling dispensers is more convenient, and evaporation from them creates some kind of microclimate for the plants. However, a small, real revolution in bottle-drip irrigation was made by the appearance on sale of nozzles in threads for bottle necks with ready-made dies, on the right in Fig. They were first invented by indoor gardeners; tips of pastry syringes were used. In addition to other advantages of deep watering, you can stick dispensers into the ground obliquely, delivering water directly to the roots.

Other options
In addition to bottles, they sometimes try to use medical droppers for targeted individual drip irrigation, see next. rice. However, the consistently positive long-term results of such experiments are unknown. reasons due to the fact that medical droppers are disposable equipment:
- The thinnest filter gets clogged very quickly.
- Remove the filter - the needle becomes clogged with soil a little slower.
- The flow regulator clips quickly burst, the wheel pins come out of the grooves and the adjustment stops altogether.
- Hoses also quickly become cloudy, become slimy inside, and swell; the lumen of the hose is reduced, and then the tubes generally creep apart.

In addition, honey an IV costs money, and not very little. And if the medical staff, contrary to the strictest prohibition, does not destroy them after use (droppers for medicines cannot be disinfected), then who knows what patients were given them. And wouldn’t any of them share their ailments with you through a dropper...
On fairly large areas, up to 6 acres or more, surface drip irrigation from relatively available materials can be arranged, as shown in the figure:

Irrigation lines (irrigation tapes) are made from a PVC garden hose with a caliber (clearance diameter) of 3-8 mm, it is relatively inexpensive. The dies in them are made as described above. The holes in the bottoms of the buckets are drilled along the outer diameter of the thread on the neck; Such a spout is tightened with a standard plug; perhaps with a thin rubber seal. The holes in the plugs for the hoses are 1-1.5 mm smaller than their outer diameter, then seals will not be needed here. For a weekend home, this is perhaps the optimal solution: the entire system can be easily deployed, and before leaving it can be rolled up and hidden.
Note: a similar type of system, but much less expensive in all respects, can be built for growing seedlings at home, see video below.
Video: drip irrigation for seedlings at home
Throughout the area
We have already come close to drip irrigation of fairly large areas from pressure water supply sources with water supplied through pipelines. A water-tube drip irrigation system is built according to a complete and simplified scheme, depending on the value of the initial pressure: with a normal pressure of 0.7-3 bar or a low-pressure of 0.1-0.3 bar. A pressure of 1 bar corresponds to a lift of the pressure tank of 10 m, i.e. in low-pressure systems, raising the pressure tank 1-3 m above ground level is sufficient. This greatly simplifies the installation of both the system itself and the pressure tank; the costs for them are correspondingly reduced. But it is difficult to ensure high-quality watering of beds longer than 10 m in a low-pressure system, and technically impossible for beds longer than 20 m.
Note: We do not consider high-pressure irrigation systems, for example, mist irrigation, because making them with your own hands is unrealistic, and the cost of construction is very high.
The design of both drip irrigation systems is shown in Fig. top left and top right respectively.

In both cases, a squeegee (bottom center) is connected to the water supply source (water supply, general pressure tank, submersible pump in a well or borehole) - a device for preparing irrigation water, monitoring and regulating its flow. The squeegee, in addition to the shut-off valve, must be equipped with a special filter, because additionally unfiltered water will immediately damage the entire system. The main pipeline(s) with an optionally installed fertilizer solution injector are connected to the runoff, and distribution pipelines (drip pipes, irrigation tapes or just tapes) laid on the beds are connected to the main line. The tapes are equipped with droppers that carry out the actual watering.
Note: the design of individual elements and methods of installation of low- and normal-pressure drip irrigation systems differ markedly, see below. The reason is the varying degree of influence of viscous friction of water in pipes; in low-pressure systems it is relatively higher.
About pipes
Main pipes and, most often, tapes are made of low-density polyethylene (HDPE) and are sold as HDPE pipes or simply HDPE. “Low pressure” in this case characterizes the production technology of this plastic: at low pressure with the participation of a catalyst. HDPE pipes are inexpensive and very resistant, with a service life of over 40 years. However, when heated to more than 60 degrees, catalyst residues (cadmium) can be released, which is why food-grade and household polyethylene is more expensive and high-pressure.
Drip irrigation systems are assembled from HDPE pipes for laying in the ground, black with a longitudinal blue stripe. Pipes for internal distribution (green) in a temperate climate can withstand 5-6-10 seasons. PVC-reinforced irrigation hoses are not suitable for the construction of stationary irrigation systems, because... do not withstand constant exposure to the external environment for more than 1-3 years. The caliber of main pipes is taken within the range of 12-40 mm for areas of 6-40 acres with an aspect ratio of 1:1 to 1:3. The caliber of the tapes is 16-75 mm for their length limits of 10-100 m.
Low pressure
Low-pressure systems are suitable for summer cottages or personal plots of 6-20 acres. It is possible to make low-pressure drip irrigation from HDPE pipes with a wall thickness of 0.5-1 mm on simple fittings with a tension connection, bottom right in Fig. When designing them on slopes, it is necessary to route the highways horizontally, and run the tapes from them along the slope. This will to some extent compensate for pressure losses in the belts. Often in this way it is possible to obtain a uniform flow rate from cheaper and more reliable uncompensated drippers, see below.
Normal pressure
Installation of normal pressure drip irrigation systems is made from HDPE pipes with a wall thickness of 2-4 mm. When they are powered from a common pressure tank in the attic of a one-story house, a booster pump can be embedded into the main line. Normal pressure pipelines are assembled on fittings with pressure, bottom left in Fig. The tapes are removed from the main line using start connectors, which perform the functions of tees-branches and pressure reducers. Through start connectors with taps, tapes or areas are connected, the pressure in which should be significantly lower than the normal pressure; in this case, a greenhouse, a short single bed and a garden.
How to install drip irrigation yourself using ready-made components, see the video tutorial. And we will further deal with some essential details, following the flow of water.
Video: how to assemble a drip irrigation system with your own hands
Tank
The supply tank of the irrigation system must be opaque or protected from light to avoid the development of unicellular algae in it (water blooms), which instantly clog both the filter and the droppers. In addition, the water in the tank should not heat up in the heat: watering with overheated water is detrimental to plants. For these purposes, the tank in the open air is covered with a galvanized screen or wrapped with metallized thermal insulation, for example. folgoizol.
The lid of the tank must be tight with air drainage to prevent dust and spores of microorganisms from entering it. The source for connecting the drainage is made at a height of 10-15 cm from the bottom, and the sediment is periodically pumped out or drained. As for the volume of the tank, it is calculated based on the plants’ water needs, the expected average monthly rainfall in the area and the frequency of filling. In general, in Central Russia, a cubic tank is enough for 6-12 acres for a week.
Controller and kick drum
An irrigation controller is considered an unaffordable luxury. This is true for devices from approx. for $2000 for greenhouse farms with a productive area of hectares. But there are also household irrigation controllers on sale for less than $50-30. They allow you to set the time and duration of watering. Slightly more expensive models are equipped with a soil moisture sensor and skip watering if there is already enough moisture in the soil. It can also be equipped with a precipitation sensor, which allows watering to occur when it rains. With such a controller, it is quite possible to build a maintenance-free greenhouse “from weekend to weekend” 3x6 m with a storage tank from a 200 liter barrel. However, we will return to drip irrigation of greenhouses more than once.
Filter
A drip irrigation filter is generally designed in the same way as a tap filter, but should provide finer filtration without clogging too often. The most commonly used irrigation water filters are trace. types:
- Mesh ones are the simplest and cheapest, but they get clogged quickly. The cartridges in them have to be changed at least once a week, or even after each watering, depending on the initial water quality. If the water hardness exceeds 16 German degrees (the maximum permissible according to sanitary standards is 29 degrees), they completely fail instantly.
- Disc ones are somewhat more expensive, but the cartridge needs to be changed 2-3 times a season, or even not every season. Most commonly used.
- Turbine (centrifuge filters) are the most expensive, but they purify water even from a puddle. No consumables are required; cleaning involves unscrewing the drain plug and draining the sediment.
Fertilizer injectors
There is no opportunity to touch on the subtleties of agrochemistry, but in this case they come down to one thing: It is incorrect to pour liquid fertilizer into the tank. Plants intended for food should be fed in portions during watering. That's why a fertilizer injector is needed; no - bring them into the beds by hand.
Firstly, water must be supplied to the injector in 2 parallel branches, each designed for full flow. In addition to inlet valves, they also need valves in front of the injector, allowing the branch to be cut off from 2 sides. If there is no boost pump in the system, then it is better to install 2 leads, then a tee, and an injector immediately after it.
Why such difficulties? First, suddenly the single squeegee becomes completely clogged, and a concentrated solution of fertilizers flows to the plants, causing them to “burn.” And with partial blockage and a drop in flow, nitrates will be deposited in fruits, bulbs and roots. Therefore, the branches of the paired flow are periodically cut off, and in the branch that is undergoing maintenance, the filter and the pipe lumen are checked and, if necessary, cleaned.
Second, The fertilizer injection scheme for drip irrigation depends on the type of system and the method of feeding it, see figure:

In low-pressure systems, simple injectors with a mini tap are used, pos. 1. When powered from a water supply system that provides a stable “household” pressure of 1.65 bar (1.85, 2.05 bar, etc. in countries and regions with varying degrees of water supply), use the diagram in pos. 2. In systems with a booster pump - circuit with overflow, pos. 3, otherwise pressure surges at the pump outlet will “throw” water into the fertilizer tank. When powered from an autonomous water supply system with unstable pressure - a circuit with a low-power solution pump, pos. 4. It is turned on either from the irrigation controller, or manually according to pressure gauge readings.
Note: in the latter case, and in general if the pressure in the water supply is unstable, if the irrigated area is not very large, it is better to turn all drip irrigation into low-pressure using a regular toilet flush tank, see fig. The standard drain is plugged, and the squeegee is connected at the level of the waterline of the float raised until the water supply stops. The pressure in the irrigation system will then be very stable.

Tapes and droppers
These are the key elements of the system, so, as they used to say, they should be given the utmost attention. Micro-perforated irrigation tapes, or oozing hoses, pos. 1 and 2 in Fig. The dies are pierced with a laser. Due to the absence of pressure losses on the fittings, the length of oozing hoses in low-pressure drip irrigation can exceed 50 m. However, due to excessive evaporation from a large total surface of artificial dew and sensitivity to dust, they are of little use for open ground, but for drip irrigation of a greenhouse, a oozing hose is almost perfect option.

Note: sometimes oozing hoses are called integrated drippers, but the latter can be of a completely different type, see below.
In labyrinth drippers, part of the water flowing through the pipe enters a winding channel, and from there it drips out. Labyrinth droppers built with tape (item 2) are good because they are cheap (plus savings - no additional fittings are needed) and because they provide a relatively stable droplet flow rate over a fairly wide range of pressure fluctuations in the pipe. This is explained by the large influence of viscous friction in the labyrinth. In addition, holes in the tape for them can be punched even with an ordinary stationery hole punch (see below for more details). But salts are deposited quite quickly in the labyrinth, which disrupts the functioning of the system; Frequent tightening and pulling of the hose for cleaning is not only labor-intensive, but also soon leads to the need to change the entire tape.

Most often, external drippers are used for surface drip irrigation, pos. 3-8; on pos. 3-5 – integrated, or dropper-emitters. They are:
- With smooth flow control.
- With fixed flow rate (1-2-3-4 l/hour).
- Both of them – with compensation for pressure losses and uncompensated.

The basis of the loss compensator is a silicone membrane (item a in the figure on the right). It bends when the pressure increases and partially blocks the main flow through the dropper. Therefore, it is necessary to regulate it on a tape with compensated droppers at minimum pressure in the line, or starting from the far end of the tape. As for the design of the flow regulator, a flag type is more convenient, but flag droppers are more expensive than those with a dial regulator, approx. by 5%. When purchasing tens/hundreds of units, this is significant.
At pos. 6 – outlet dropper. Allows you to lay the tape between the rows, which makes it easier to care for both the plants and the irrigation system, but drip irrigation with outlets will be quite expensive: additional ones are needed. tees (many) tubes.
Pos. 7 – a dropper with the possibility of micro-sprinkling, which is necessary for strawberries. For such tapes at the sources, switchable chokes or start connectors with taps are needed: first they give full pressure, and when the bushes are wetted from above, they lower it to a drop under the roots.
Pos. 7 – dropper-dispenser for deep watering. These are applicable on unclogged, highly permeable soils; as a rule - artificial, for example. filling with expanded clay in greenhouses with container culture. For deep drip irrigation in ordinary soils, drippers with 2-4 outlets and tips immersed in the soil are used, see next. rice.

About the installation of droppers
“In the company style,” holes for droppers in the tapes are punched with a special hole puncher-insector, which allows you to cut through only one wall of a thin-walled pipe by weight. Install the emitter droppers using mounting pliers (on the left in the next figure) using rubber seals, in the center and on the right.

It is believed that otherwise it is impossible to ensure the tightness of many joints for a long time outside of production conditions. However, those who like to think and tinker often place emitters on tapes according to the following mini-instructions:
- The pipe section is heated to approx. up to 50 degrees, but without allowing the plastic to soften, using a household hairdryer or scalding with boiling water;
- Immediately, in a warm pipe, drill a hole with a diameter along the neck of the emitter pipe;
- Immediately push the dropper pipe into the hole. As the pipe material cools, it contracts and tightly grips the pipe.
There is nothing prohibitive in this technology: hot tension fit is widely used in industrial production, incl. for particularly critical units. But remember: the guarantee of tightness of many connections made in this way is only your skill and accuracy.
Note: The standard spacing for installing dropper emitters is 30 or 50 cm.
Garden tapes

Garden drip irrigation tapes are laid by circling the bushes with a “snake”, figure eight, etc., and the trees – in circles, see the figure on the right. Therefore, they require thin-walled flexible tubes. In normal pressure systems, in this case, a start connector with a tap is required before the source into the tape, or, better, a throttle-reducer in front of the tap.
Drops in greenhouses
The use of drip irrigation for private farms in moderately humid climates is most economically profitable in a greenhouse. For example in Fig. Drawings of a drip irrigation system for a 6x3 m greenhouse and specifications for 2 options of components for it are given.

The costs of creating drip irrigation in a small greenhouse, given per unit of its productive area, are much lower than for open ground, and productivity is also much higher. Therefore, drip irrigation for greenhouses is quickly gaining popularity, and complete sets of their elements, including a controller, are available for sale for standard-sized greenhouses, on the left in the following. rice. The price of the kit is significantly lower than when purchasing components at retail. An additional plus is that conscientious sellers provide a guarantee on everything except the relatively inexpensive hose. Therefore, the system can first be tried on dry in a separate area, assembled, made a test run, and then, if everything is in order, installed on site.

For drip irrigation in a greenhouse, you need a controller with a soil moisture sensor, otherwise, due to the small evaporation to the outside, it is very difficult to avoid acidification of the soil and all sorts of misfortunes to the vegetation. But what if the greenhouse is not electrified? Make an autonomous power supply? And if it is not yet serviced regularly, automation of watering is inevitable. With my own hands, because Turnkey automatic watering systems are very expensive.

One solution to this problem is shown in Fig. The basis is a solar battery (SB) at (15-18) V (possibly homemade) with an area of 1-1.5 square meters. m and a 12V 65A/h car battery. The battery can be recharged simply through a 10A diode, because The short-circuit current of the SB is only slightly greater than the current contained in the battery. Buffer water tank – 200 l barrel.
It is better to use a 12V submersible pump. The 220V pump can be turned on via a household inverter 12VDC/220V 50Hz AC. To avoid draining the pump by the siphon effect, the barrel must be buried in the ground. For the same purpose, an electromagnetic shut-off valve is installed on the supply pipe in front of the flow meter/controller, electrically connected in parallel to the pump. That is, if the pump is 12V, then the valve needs a 12V valve, or both at 220V.
In this system, a reverse siphon effect is also possible, which will pull water and ground back, causing the drippers, pipes and filter to become clogged. The remedy against it is a check valve immediately behind the controller, if you look at the water flow.
Want to save your time and effort? Don't water with a bucket or hose? Drip irrigation of the greenhouse will cope with soil moisture without you. And you can make it yourself from scrap materials. Details about the irrigation system using a barrel and medical droppers are in this article and in a useful video.
Better often, but accurately
Rare and abundant watering is undesirable for most plants. It is better to water frequently with a small amount of water. The most optimal watering is microdoses, with which the soil is always moist. This type of irrigation can be achieved using a drip irrigation system. Of course, this requires work. But the time and small funds invested in the system will pay off in the hot summer, when instead of standing with a watering can or hose in front of each bush, you simply open the tap.
In addition, this system will make the feeding process easier. Fertilizers can be diluted in a container with water, and the solution will gradually flow directly under the roots.

Drip irrigation is optimal for plants
Automatic watering system. Pros and cons
Let's consider the arguments of experienced gardeners in favor of or against automatic watering:
- the liquid supplied to the roots is absorbed one hundred percent. And if you water it in the usual way, it partially evaporates;
- Many crops do not like water constantly falling on their leaves. With drip irrigation, water enters the root zone gradually;
- you can provide different vegetables with the watering rates they need;
- a crust does not form on the soil, there is no need to constantly loosen the soil;
- the root system receives enough oxygen, since it is not displaced by water;
- with spot watering, the weeds do not have enough moisture and they practically do not grow;
- Various pathogens and fungal infections multiply less;
- According to practitioners, up to 50% of water is saved;
- The work of a summer resident is greatly simplified.
There can be only one argument against the construction of such a system. If you have not purchased a ready-made drip irrigation kit, you will need to make it yourself. This means that you need to calculate everything, find or buy components, and think through some nuances.

A ready-made drip irrigation system is expensive, so to save money, you can make it yourself
Types of irrigation systems
You can water your garden or greenhouse by sprinkling, subsurface and drip irrigation. Sprinkling is irrigation from above using special rotating equipment.
With the subsoil irrigation system, special porous hoses work. This is convenient if the beds contain perennial plants that require careful care.
Drip irrigation is a system of pipes with taps and droppers, stretched from a barrel of water or from a central water supply.
Spot irrigation with drip tape
Tip: If you didn’t buy special plugs, you can do without them. Pinch the sleeve of the tape and wrap it with strong thread.

You will need:
- central water supply with pump and storage tank for water. For example, a barrel;
- racks for installing a barrel;
- if you bought a set of necessary elements, like “Gardener-150”. Then there will be: the connectors necessary to connect the filter with the pipes, start connectors without taps and with taps, equipped with rubber seals. Distributors and fittings;
- if you do not purchase a ready-made set, then you need to buy taps, tees and plugs separately;
- drip tape (purchased or homemade);
- fine filter for connection to the main pipe;
- black polyethylene water pipe with a diameter of 32 mm;
- tools.

One of the options for drip irrigation using drip tape
Stages of work:
- Draw a plan of the greenhouse with the exact location of the plants.
- Strengthen the water barrel at a distance of 1-1.5 m from the ground.
- Connect a pipe to it.
- Install a filter on the pipe.
- Run the main pipe along the greenhouse beds.
- Attach the drip tape to the pipe using the fastener you have on hand.
- The tape should run close to all plants.
- Cap the end of the drip tape.
- Another option is to attach drip tape in front of each plant. To do this, you need to make branches from the main pipe with taps, and attach drip tape to them, make so-called sleeves.

The drip irrigation barrel is installed at a height of 1-1.5 meters
How to calculate the footage of drip tape
Attention! You can make drip tape yourself. To do this, you will need a hose with a thickness of up to 200 microns and a diameter of 16 mm. You need to make holes in it with an awl at a distance of 20 to 50 cm. Water will seep into the soil from the holes you made.

Drip tape is laid next to each ridge
You need to decide how to lay the drip tape. If in the form of sleeves for each plant, then the number of seedlings must be multiplied by the distance from them to the main tape. For example, if you have 10 seedlings, and you need to lay 50 cm of tape to each, then you will need 5 meters of tape. Better - with a reserve.
You can lay one strip along the bed if you only have two rows. Then its length will correspond to the length of the greenhouse.
Another option is to lay tape under each row. For example, for 10 rows of 10 m each, 100 m of drip tape will be required.
Irrigation system with medical droppers
Tip: Any drip system can be automated using electrical controllers. They can be powered by batteries. It is better to connect controllers after installing the entire system.
In this type of irrigation, medical droppers are used instead of a drip pipe. You should start working in the same way as with the previous method. Then:
- Mark on the pipe the distance required for the branches, according to your plan.
- Drill holes at the marked locations with a drill.
- Prepare as many droppers as there are seedlings in the bed.
- Attach the dropper to the hole with the side that should be installed on the jar of medicine.
- Place the other end of the dropper under the root of the plant.

Holes are made in the hose, to which a medical dropper is then connected.
The advantage of this method is that each dropper has liquid supply regulators. However, you need to ensure the cleanliness of medical devices; they can become clogged with sand or other impurities contained in the water.
Irrigation with hose and pump
Spot watering can be done in a more simplified way. Using a regular hose with through holes made with a hot awl.
- To make the holes less likely to become clogged, you need to punch them twice. First from left to right, and then from top to bottom. The distance between punctures is 30-35 cm;
- Place the finished hose along the beds, you can stretch it between two rows;
- determine the time after which watering should be carried out. Set the desired interval on the automatic controller.
With this kind of watering, you can only be in the greenhouse on weekends.

Holes in the hose are made with a hot awl
Drip irrigation using plastic bottles
Attention! If you need spot watering of carrots, beets and cucumbers, then holes in the main hose are made at a distance of 15 cm. For tomatoes, the gaps should be about 30 cm.
The easiest way to use plastic bottles is as follows.
- prepare as many two-liter bottles as you have plants;
- use an awl to make several holes in a checkerboard pattern on each side on the sides of the bottle;
- bury the bottles next to the tomatoes or cucumbers so that the neck is on the outside;
- pour the water. It will gradually enter the plants.

The advantage of the method is its accessibility and cost-effectiveness. But it does not make the summer resident’s work as easy as other options. After all, you need to add water to your bottles every 3-4 days.
If you cut off the bottom of the bottle and dig it into the ground with the neck down, it will be more convenient to add water.
Maintenance of the existing irrigation system
For long-term operation of drip irrigation, practitioners advise periodically maintaining it.
- Remove all plugs, open the water and rinse the equipment with running water for about half an hour.
- Rinse or promptly change the filter cartridge.
- Never allow the entire set of pipes to remain idle without water. Otherwise, specks and grains of sand will accumulate on the lower parts of the components and harden.
- If the greenhouse is not heated, then for the winter the system must be dismantled, first washed and dried.
Each of these options, from the simplest (the main element is plastic bottles) to the most complex (using an automatic controller) will reduce labor costs and significantly increase the yield.
Do-it-yourself drip irrigation - video
Do-it-yourself drip irrigation - photo


